
We have a lot of robot gurus here at Clearpath; I’m talkin’ hardcore experts. There are a few of us, however, who are a little rusty on our robot-building skills. As in, we don’t have any… You know who I’m talking about – the people in finance, supply chain, and little ol’ me in communications (although dare I say we’re experts in our respective fields!) Since we love robots so much, we figured it’s time to learn how they’re made. So Clearpath introduced the Clearpath Robo-School. It starts with an introduction to building robots and then follows with lunch and learn programs to cover topics spanning sensors, ROS tutorials, trends in robotics, and more. Sit back and enjoy my first-timer account of building a robot.
Step 1: Build the robot

Building the bots!
Okay Lego-lovers, I hereby declare that building a physical robot is easier said than done! You see, I wear the “I BUILD ROBOTS” t-shirt, but I’ve got a deep dark secret to share: I’ve actually never built a robot before. I know, I know… But hey, that’s why I’m in Clearpath’s Robo-School!
Lego Mindstorm was used as the teaching tool and was a great introduction to robotics. After channeling my inner-10 year old (when once-upon-a-time I was a fairly expert block-builder), I successfully assembled the robot base: wheels, sensor, arm and computer included. I think the biggest challenge of all was finding the right pieces in the kit.
Step 2: Make it Move with Software

Mindstorm Drop and Drag Software
I have to admit, I was relieved to see that I wouldn’t be trying to figure out detailed C++ or html code for the day. Rather, Lego Mindstorm uses a drop-and-drag system so I could familiarize myself with the fact that programming is sequential and movements must be made one step at a time. Loops came in handy particularly when I wanted my mini bot to move around on the floor as if it were tracing a box (straight + right + straight + right…). When turning, we had the option to select ‘tank blocks’ for more direct control or ‘steering blocks’ which were fairly arbitrary units on turning. I liked using the tank blocks option, which is appropriate since Husky is built with the same mechanism. To be exact, it’s actually differential drive, which means the outside wheels turn at a different pace or direction than the inside wheels to either make a large turn or turn on the spot. And yes, I realize most of you reading this might be aware of that already, but I just had to gloat my newfound knowledge!
Step 3: Getting Fancy

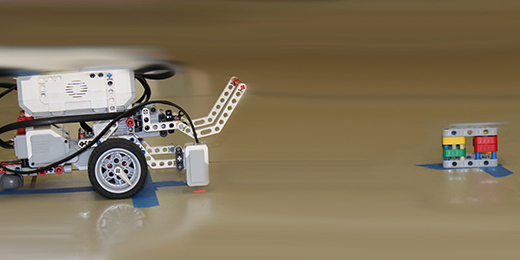
Completing the obstacle course
First it moved in a square; that was invigorating! Next up was to program the tiny bot to move along an obstacle course laid out on the floor. It reminded me of bowling, but without the bumpers! (Oh, am I the only adult who still uses bumpers when bowling?)
It wasn’t completely smooth sailing, however, as I did hit a few challenges along the way. The biggest ones were calculating how many wheel rotations to make in order to drive the bot along the length of the path – it took some trial and testing but I made it work! The other challenge was making the large arcing turn at the end of the course. I was up and down a number of times tweaking the code and testing it, but alas! I figured it out! In the end, I surprised myself by completing the task fairly quickly. I even figured out how to add in sound effects upon crossing the finish line of the course so it sounded like a crowd was cheering on its success.
Step 4: Switches and tricks
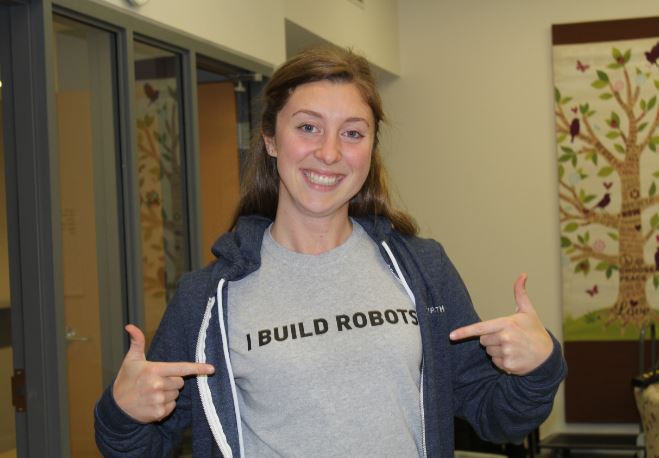
Here I am! And yep, I build robots!
The next phase took it up a notch; I learned how to follow a line by implementing switches. To do so, I attached a weight block to my bot and created a single condition that the sensor was looking for (in this case, it was the contrasting line on the floor). It would move in search of the line until it found it, turn slightly, and then repeat the search for the other side. It used motor control and reflective light intensity, but I learned that it also could have used colour identification too by looking for the black line. In turn, it ended up looking like my robot was wiggling its way along a black circle.
Ultra sonic sensing was also pretty cool. The robot would send out a sound which would then bounce of the closest object in front of it, so the robot could identify its environment and understand where it stood. We did a couple tests that told the bot to drive until it was 10 cm in front of the wall, then stop and turn right. And by golly – it was like magic!
Am I ready to start building the next generation of Husky? Probably not… okay definitely not. BUT! I know a heck of a lot more now than I did a week ago and I can wear my “I BUILD ROBOTS” shirt with pride! Clearpath robo-school phase 1 is complete, thanks to our friends at Brick Works Academy!